Registered Documents
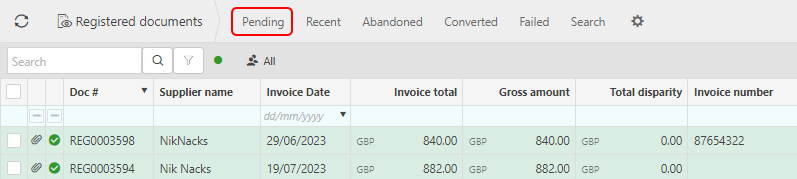
After emails have been scanned via the AP automation process, any attached documents will then be stored as draft Documents in the Registered Documents. These documents will now show by selecting the Pending set.

Tip
Pending Registered documents that have not been processed within a set number of days can be Auto emailed to users via the Scheduler
Tip
To optimise the timely creation of Registered documents, we recommend using Auto forwarding to the AP Automation mailbox, setting this up on your email client.
The user can now view and make any amendments to these documents before converting to the appropriate iplicit document - Purchase Invoice, Purchase Order, Cash Purchase or Credit Note.
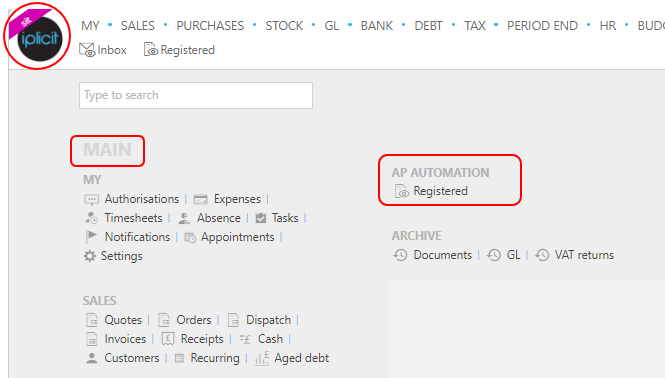
Either select Registered from AP Automation in the pulse menu -
Note
This is an example screen shot of the pulse menu.
Position of the menu items within pulse will vary according to available options and dependant on personal screen resolution.
or from the Main Menu select AP Automation then Registered -

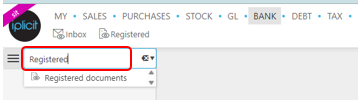
or enter Registered in the Quick Launch Side Menu.
You will then have a list of any documents that have been successfully converted as draft Documents.
Normal customisation of Sets can be used. An extra Set here is the Abandoned Set.

Select the Pending Set - this will show documents waiting for some action.
Some of the attributes explained - to modify the attribute columns displayed, select
 in the top right of the page, then tick/untick the attributes you want to see or not.
Doc# - the Registered document reference.
Supplier name - Suppliers ID if previously setup in Suppliers.
Scan - the OCR method that was used to scan. Selecting Ctrl, underscores the methods and selecting one gives further details.
Inbox item - the original scanned email ID that had the document attached. Selecting Ctrl, underscores the Inbox items and selecting one takes you to the Inbox message view showing further details.
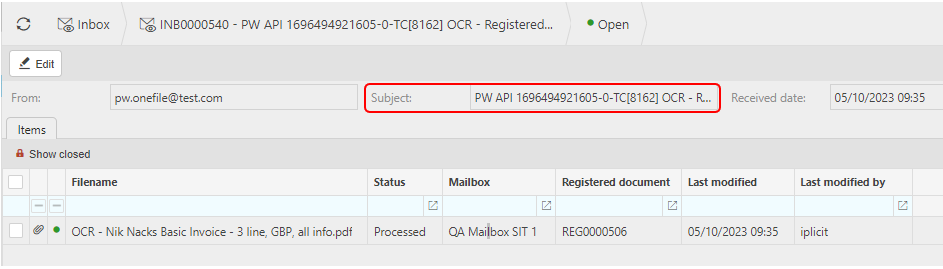
This view includes the Subject - showing the original message.
Tip
To modify the columns displayed, select
in the top right of the page, then tick/untick the information you want to see or not.Select each Registered Document in turn, which will show the document/s that the scanning process has attempted to convert and translate the document.
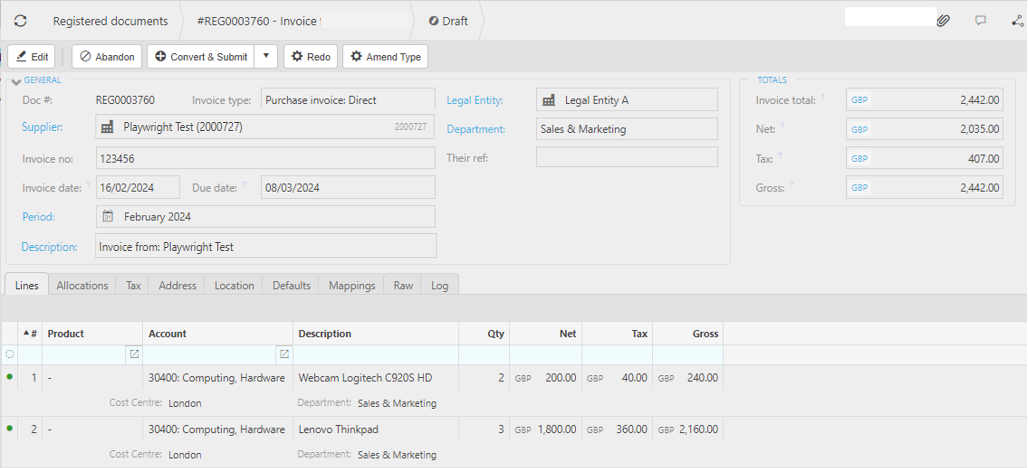
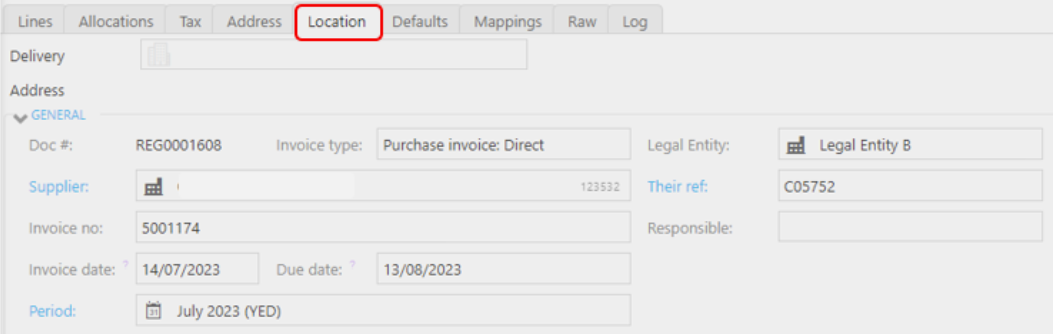
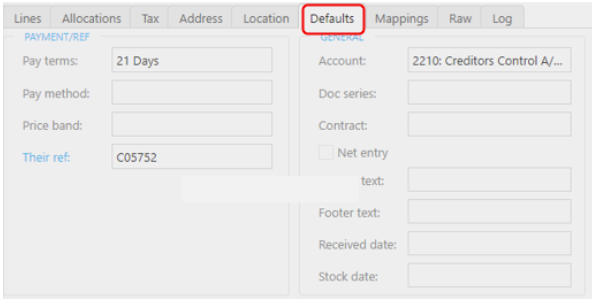
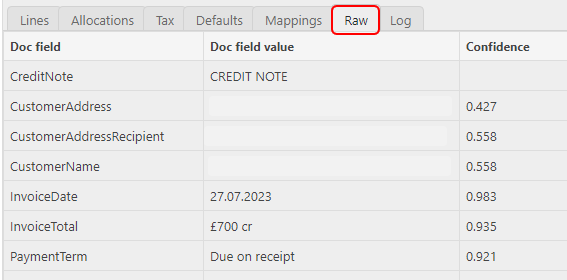
The Tabs
View the original scanned document along with the document details - click the
 in the top right corner -
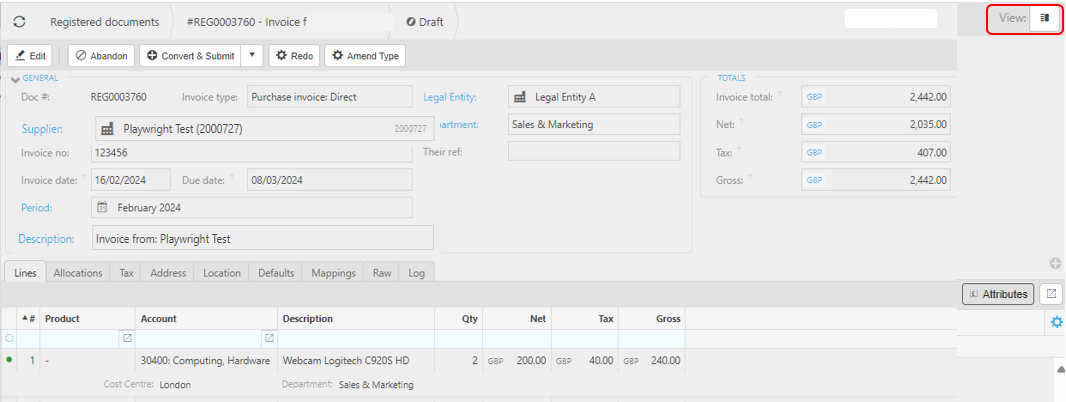
Key checks -
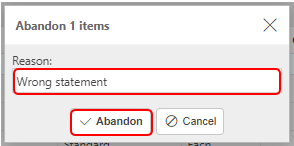
If the Registered Document is not a purchasing document, for example a statement, then it can be Abandoned.
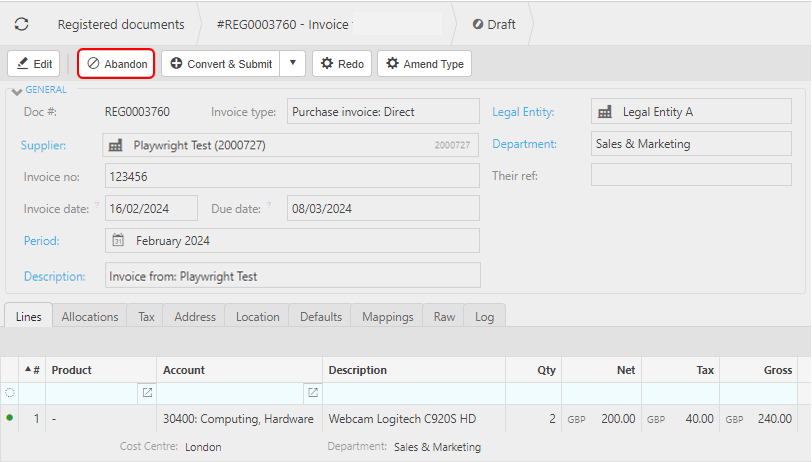
Enter a reason for abandoning, and then select Abandon.
The Registered Document will now show with an Abandoned stamp. Also, the options to Edit, Convert or Redo are no longer showing. Only the
 option will show, which will enable you to Unlock the document and reverse the Abandon process.
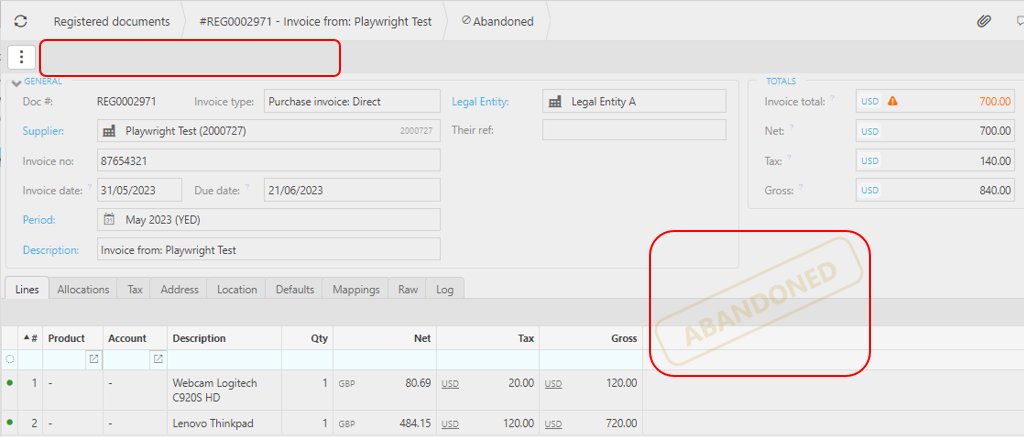
The Log tab will be updated with the reason for abandoning.

[NOTE]
Once a Registered Document has been Submitted, it can no longer be Abandoned.
To Delete a Registered Document that has been Abandoned, highlight the document, then select Delete on the
button.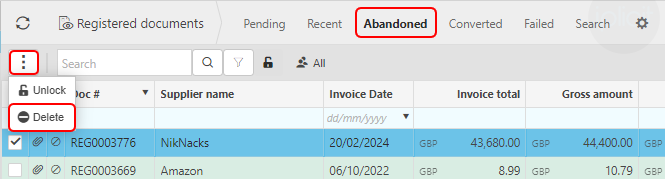
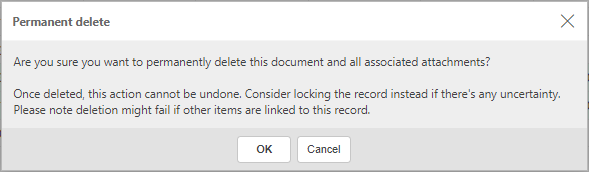
Confirm deletion on the message that shows.
If the Registered Document has been incorrectly matched to a Cash Purchase instead of a Purchase Invoice, or vice versa, then use the Amend Type option to change to the correct document.

You will be prompted with a warning message to confirm this action.
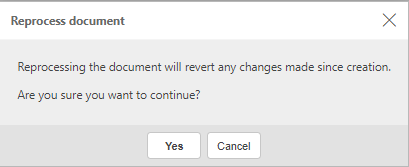
Your Registered Document will now be correctly matched to either a Cash Purchase or a Purchase Invoice.
Note
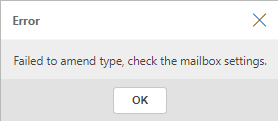
If the Document Type has not been setup in the defaults section in Automation Mailbox ...
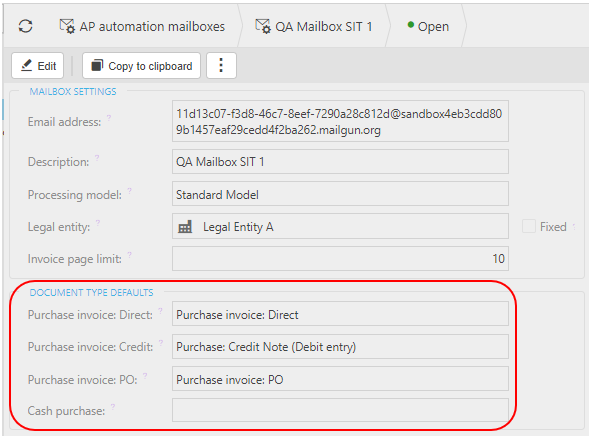
... the Amend Type process will not proceed and the following error will occur.
The Amend Type process can be performed multiple times. The most recent occurance will be recorded in the Log.

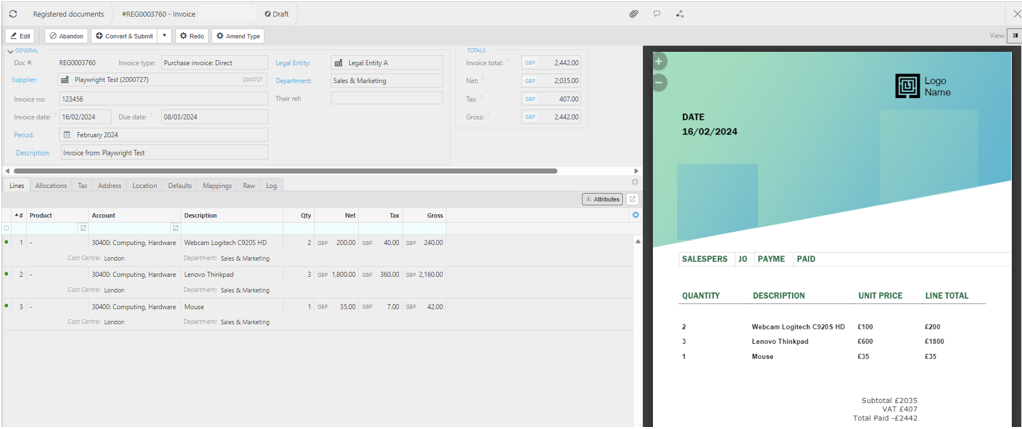
The user can compare the scanned information with the actual document and make appropriate changes.
Examples of possible reasons for changes -
- Legal Entity/Supplier is not matched due to incorrect supplier details.
- A new Supplier has not yet been created for the invoice received.
- Incorrect defaults have been applied.
- The Tax Code will always be populated with the default Tax Code from the Supplier. If any Tax Code differs in the document, then it will be up to the user to make appropriate changes to reflect these differences.
Note
If a Supplier was previously known with another name, this can be resolved by entering Alias names on the Advanced tab in Legal Entities and on the Suppliers tab in Suppliers
Tip
To modify the columns displayed, select
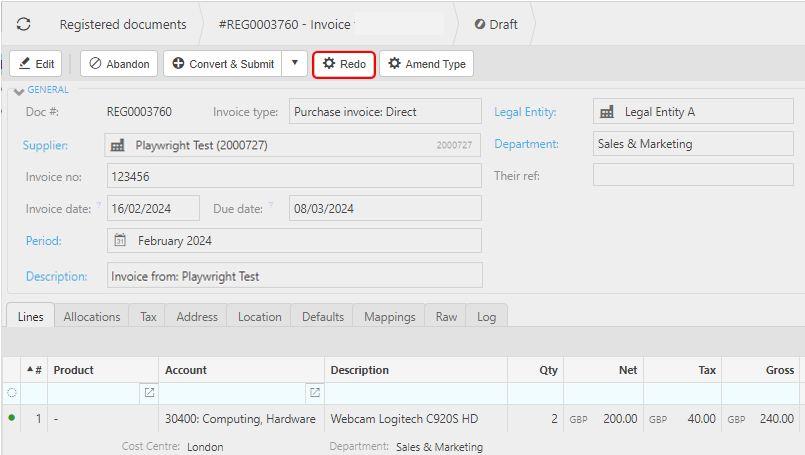
in the top right of the page, then tick/untick the information you want to see or not.Once the data has been corrected, select the Redo button which will reapply all the mappings to the current Registered Document. This will check the mappings are correct before the document is converted.
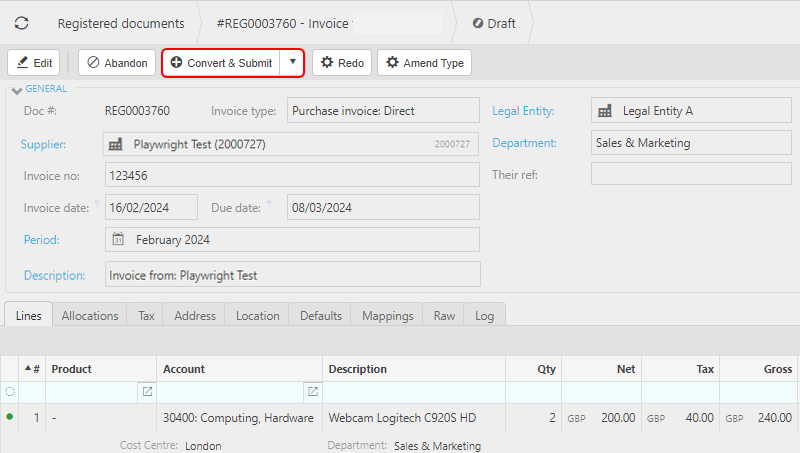
Once all amendments have been checked in the section above, the Registered document can then be converted to the appropriate iplicit document - Purchase Invoice, Purchase Order, Cash Purchase or Credit Note.
Select Convert & Submit to send the document to your iplicit accounts followed by an immediate Submit.
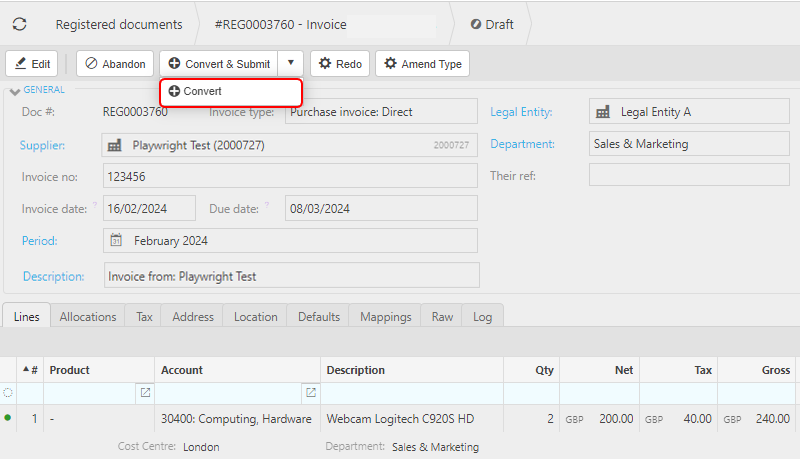
Alternatively, select Convert, from the dropdown option, to send the document to your iplicit accounts. You can then go to the appropriate document and Submit as required.
Select the next Registered Document (if there is one) and repeat the same process.


Updated March 2024