Stock Transfers
The transfers feature is used to record Stock being moved from one Location to another e.g. warehouse to storefront.
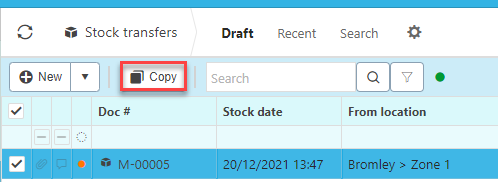
The screenshot below shows a sample grid of stock transfers, which includes some key information.

Grid information explained
Doc #: The document number.
Stock date: The date the transfer was made.
From location: The location the stock was transferred from and to.
Tip
To modify the columns displayed, select
 in the top right of the page, then untick the information you do not want to see.
In this section you can
Copy a stock transfer
If you are regularly repeating a stock transfer you can copy a pre-existing one rather than creating a new one every time.
To do so, select the stock transfer that you would like to copy then press Copy.
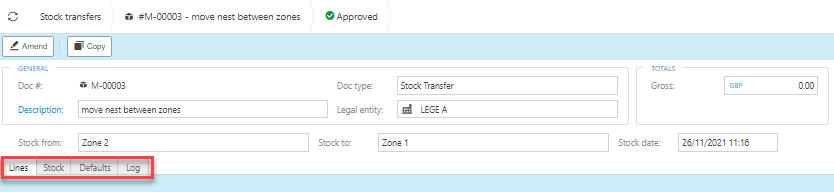
Amend a stock transfer
To makes changes to a stock transfer double click on the chosen transfer then press Amend

Make the needed changes then press Save.
Find a stock transfer
You can use the search bar to find a specific transfer by entering a key word.

You can also toggle between sets or create your own.

To create your own sets press
 then fill out the selection criteria.
View transfer details
Open the transfer in question and you will find the tabs along the bottom.
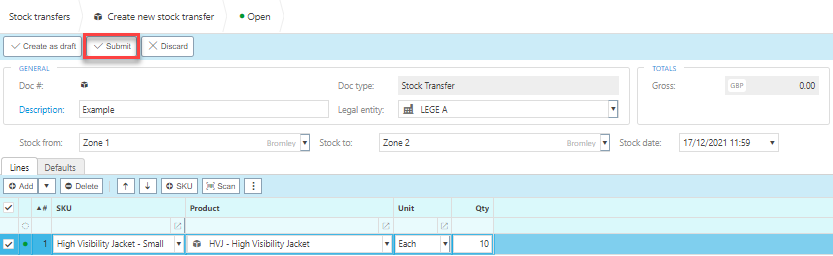
Create a new stock transfer
Press New.
Enter a description.
Fill in the remaining fields depending on your needs.
Remaining fields explained
Doc Type: This will be auto filled with the Document type.
Stock Date: The date of the transfer.
From location: This is the Stock location that the Stock product is being transferred from.
To location:This is the Stock location that the Stock product is being transferred to.
Legal entity: Select the Legal entity.

Add the lines.
Lines explained
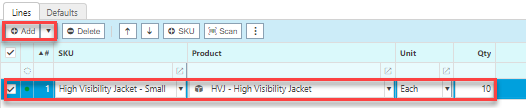
- SKU: This is the Stock keeping unit.
- Product: This is the Product being transferred.
- Unit: This is the Unit to measure the Product
- Qty: This is the quantity of the Product being transferred.
- Unit price: This it the price per unit of the Product.
When you are happy with the information press Submit.
Updated March 2024